When designing an application, we must often build user-interface (UI) elements which are used in more than one place. When writing code, we usually try to follow the DRY (Don’t Repeat Yourself) principle, and we should strive to do the same when working with the user-interface.
In .NET MAUI/Xamarin Forms, we can build a user interface “component” from views and then reference this component from other views. This allows use to keep all changes to this one component and allows us to unit test it or its view model (if using MVVM) in isolation from the rest of the application.
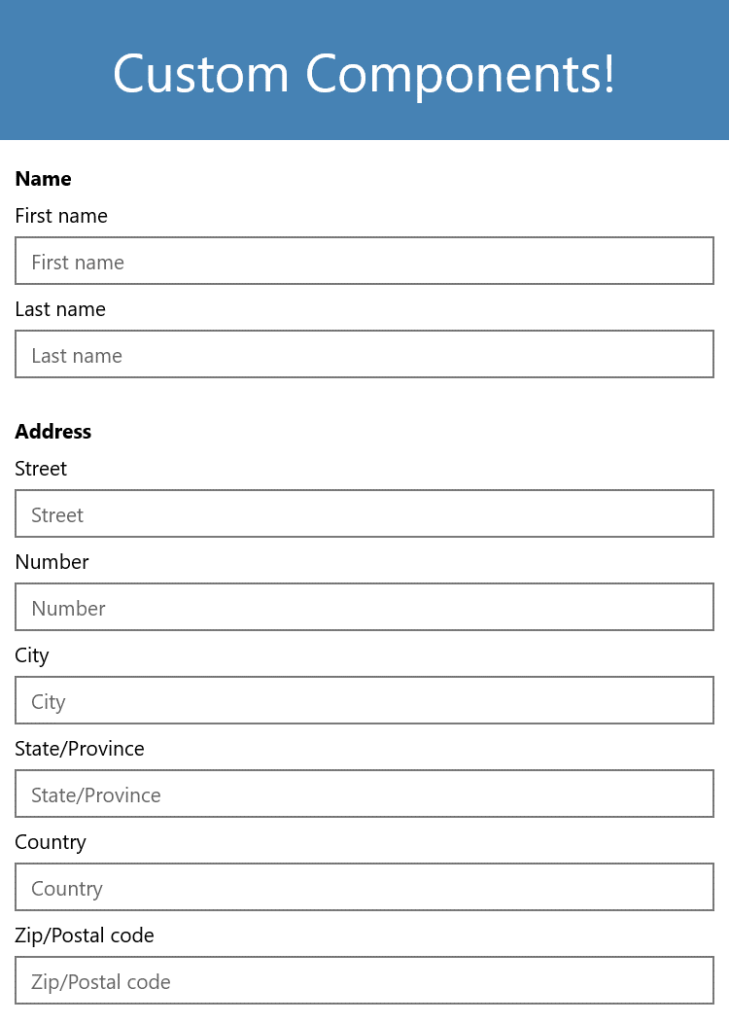
Let us look at a simple application which collects information from a user:
Here is the corresponding XAML for the UI (MainPage.xaml):
<?xml version="1.0" encoding="utf-8"?>
<ContentPage xmlns="http://xamarin.com/schemas/2014/forms" xmlns:x="http://schemas.microsoft.com/winfx/2009/xaml" x:Class="Custom_Components.MainPage">

    <StackLayout>

        <Frame BackgroundColor="SteelBlue" Padding="24" CornerRadius="0">

            <Label Text="Custom Components!" HorizontalTextAlignment="Center" TextColor="White" FontSize="36" />

        </Frame>


        <StackLayout Padding="10">


            <Label Text="Name" FontAttributes="Bold" />


            <Label Text="First name" />

            <Entry x:Name="FirstName" Placeholder="First name" />


            <Label Text="Last name" />

            <Entry x:Name="LastName" Placeholder="Last name" />


        </StackLayout>


        <StackLayout Padding="10">


            <Label Text="Address" FontAttributes="Bold" />


            <Label Text="Street" />

            <Entry x:Name="Street" Placeholder="Street" />


            <Label Text="Number" />

            <Entry x:Name="Number" Placeholder="Number" />


            <Label Text="City" />

            <Entry x:Name="City" Placeholder="City" />


            <Label Text="State/Province" />

            <Entry x:Name="StateProvince" Placeholder="State/Province" />


            <Label Text="Country" />

            <Entry x:Name="Country" Placeholder="Country" />


            <Label Text="Zip/Postal code" />

            <Entry x:Name="ZipPostalCode" Placeholder="Zip/Postal code" />


        </StackLayout>


    </StackLayout>


</ContentPage>
This application makes use of Label and Entry views for the Name (First name and Last name), and Address (Street, Number, City, State/Province, Country, and Zip/Postal Code). This is just a simple example, but in a real-world application we might require the user to input a name and address from many places in the application. We might have logic that validates the name and/or address. To keep all this logic in one place, we should extract the various Label and Entry views into one component that can be referenced by other views.
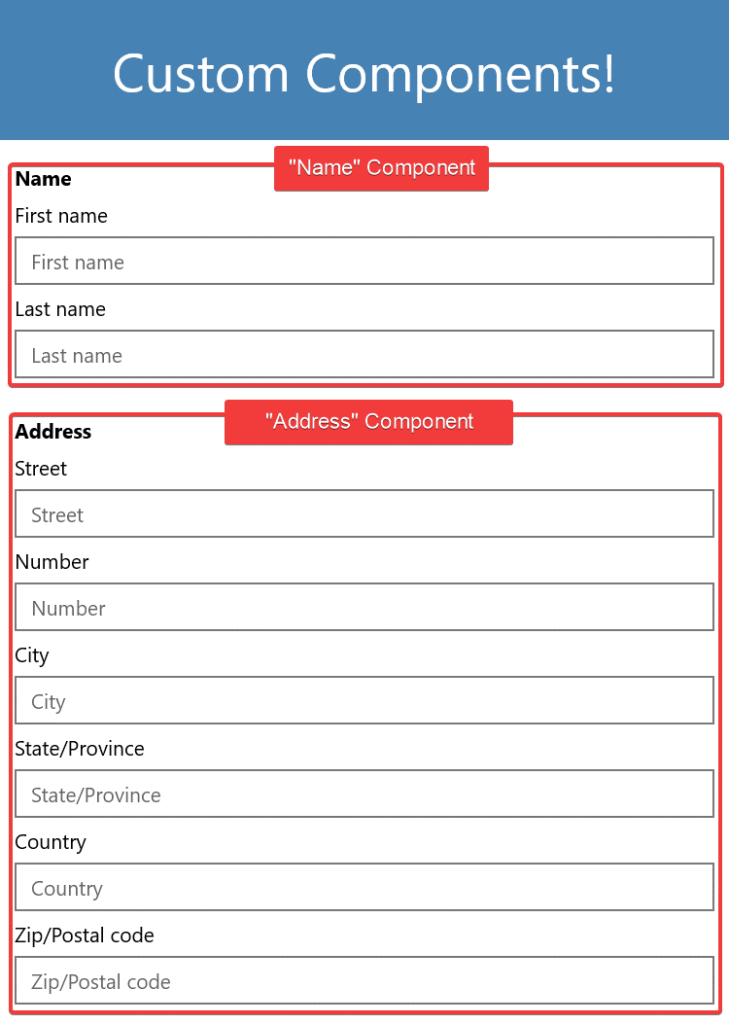
Looking at the UI, and the XAML, we can identify two “pieces” of the UI which could be separated into components – a Name component and an Address component.
“Name” component’s XAML:
<StackLayout Padding="10">


    <Label Text="Name" FontAttributes="Bold" />


    <Label Text="First name" />

    <Entry x:Name="FirstName" Placeholder="First name" />


    <Label Text="Last name" />

    <Entry x:Name="LastName" Placeholder="Last name" />


</StackLayout>
“Address” component’s XAML
<StackLayout Padding="10">


    <Label Text="Address" FontAttributes="Bold" />


    <Label Text="Street" />

    <Entry x:Name="Street" Placeholder="Street" />


    <Label Text="Number" />

    <Entry x:Name="Number" Placeholder="Number" />


    <Label Text="City" />

    <Entry x:Name="City" Placeholder="City" />


    <Label Text="State/Province" />

    <Entry x:Name="StateProvince" Placeholder="State/Province" />


    <Label Text="Country" />

    <Entry x:Name="Country" Placeholder="Country" />


    <Label Text="Zip/Postal code" />

    <Entry x:Name="ZipPostalCode" Placeholder="Zip/Postal code" />


</StackLayout>
In the Xamarin Forms project (the one with the views), add a new Content View file called Name.xaml. Cut the “Name” XAML from the MainPage.xaml file into the new Name.xaml file, replacing everything between the ContentView.Content tags. The complete XAML for Name.xaml should look like the following:
<?xml version="1.0" encoding="UTF-8"?>

<ContentView xmlns="http://xamarin.com/schemas/2014/forms" xmlns:x="http://schemas.microsoft.com/winfx/2009/xaml" x:Class="Custom_Components.Name">

    <ContentView.Content>

        <StackLayout Padding="10">


            <Label Text="Name" FontAttributes="Bold" />


            <Label Text="First name" />

            <Entry x:Name="FirstName" Placeholder="First name" />


            <Label Text="Last name" />

            <Entry x:Name="LastName" Placeholder="Last name" />


        </StackLayout>

    </ContentView.Content>

</ContentView>
Next, do the same thing for the Address component. Create a new Content View called Address.xaml and cut the XAML for the address from MainPage.xaml and paste it into Address.xaml replacing everything between the ContentView.Content tags. The complete XAML for Address.xaml should then look like the following:
<?xml version="1.0" encoding="UTF-8"?>

<ContentView xmlns="http://xamarin.com/schemas/2014/forms" xmlns:x="http://schemas.microsoft.com/winfx/2009/xaml" x:Class="Custom_Components.Address">

    <ContentView.Content>

        <StackLayout Padding="10">


            <Label Text="Address" FontAttributes="Bold" />


            <Label Text="Street" />

            <Entry x:Name="Street" Placeholder="Street" />


            <Label Text="Number" />

            <Entry x:Name="Number" Placeholder="Number" />


            <Label Text="City" />

            <Entry x:Name="City" Placeholder="City" />


            <Label Text="State/Province" />

            <Entry x:Name="StateProvince" Placeholder="State/Province" />


            <Label Text="Country" />

            <Entry x:Name="Country" Placeholder="Country" />


            <Label Text="Zip/Postal code" />

            <Entry x:Name="ZipPostalCode" Placeholder="Zip/Postal code" />


        </StackLayout>

    </ContentView.Content>

</ContentView>
The last step is to reference the new views from the MainPage.xaml file. You need to add an xmlns reference to the top of the XML file– this is like a using statement in a C# file. Using the namespace structure for the sample project, this will be xmlns:custom_components=”clr-namespace:Custom_Components”.
Then you need to add references to the new views where the previous XAML was cut from. In the end, your complete file should look like:
<?xml version="1.0" encoding="utf-8"?>

<ContentPage xmlns="http://xamarin.com/schemas/2014/forms" xmlns:x="http://schemas.microsoft.com/winfx/2009/xaml" xmlns:custom_components="clr-namespace:Custom_Components" x:Class="Custom_Components.MainPage">


    <StackLayout>

        <Frame BackgroundColor="SteelBlue" Padding="24" CornerRadius="0">

            <Label Text="Custom Components!" HorizontalTextAlignment="Center" TextColor="White" FontSize="36" />

        </Frame>


        <custom_components:Name />


        <custom_components:Address />


    </StackLayout>


</ContentPage>
There you have it. You can now reference these two new views from any other views in your application and making a change to the view will automatically apply those changes throughout your application. You will also be able to test your view in isolation to the rest of the application.